Urban destinations present a unique canvas for travel photographers, blending architectural marvels, bustling street life, and ever-changing light conditions into a complex visual tapestry. From the neon-lit streets of Asian megacities to the historic squares of European capitals, capturing the essence of a city requires more than simply pointing your camera at landmarks. Modern cities pulse with energy at all hours, offering photographers an inexhaustible supply of subjects—from soaring glass facades reflecting golden hour light to intimate moments unfolding in crowded marketplaces. The challenge lies not in finding subjects, but in developing the technical skills and creative vision to transform everyday urban scenes into compelling visual narratives that transport viewers directly into the heart of metropolitan life.
Mastering urban travel photography demands a sophisticated understanding of camera settings, compositional techniques, and the unique lighting challenges cities present. Whether you’re navigating the narrow alleyways of ancient medinas or capturing the geometric precision of contemporary architecture, your ability to adapt quickly to changing conditions will determine the quality of your portfolio. This comprehensive guide explores the essential techniques professional travel photographers employ when documenting urban environments, from technical camera mastery to ethical considerations that ensure respectful engagement with the communities you photograph.
Mastering manual mode and exposure triangle in urban environments
Urban photography presents constantly shifting exposure challenges that automated camera modes often struggle to handle effectively. The dramatic contrast between shadowed alleyways and sun-drenched plazas, the interplay of artificial and natural light sources, and the rapid pace of street life all demand precise control over your camera’s exposure settings. Manual mode grants you complete authority over the exposure triangle—ISO, shutter speed, and aperture—enabling you to make split-second decisions that capture exactly what you envision rather than what the camera’s computer suggests.
Balancing ISO settings for Low-Light street photography
Modern cameras have revolutionised low-light photography, with many models producing remarkably clean images at ISO values that would have been unusable just a decade ago. When photographing dimly lit streets, underground stations, or evening markets, you’ll often find yourself pushing your ISO to 3200, 6400, or even higher. The key lies in understanding your specific camera’s noise characteristics and determining the threshold where grain becomes distracting rather than atmospheric. For most contemporary full-frame sensors, ISO 3200 remains perfectly acceptable for professional work, whilst APS-C sensors typically maintain quality up to ISO 1600.
Consider ISO as your exposure safety net rather than your primary adjustment tool. Begin your exposure settings by selecting the aperture that delivers your desired depth of field, then set a shutter speed fast enough to freeze action or prevent camera shake—typically 1/125th of a second or faster for handheld shooting. Only then should you adjust ISO to achieve proper exposure. This hierarchical approach ensures your creative priorities dictate the technical settings rather than allowing technical limitations to compromise your artistic vision. When shooting in particularly challenging lighting conditions, such as neon-lit entertainment districts after sunset, don’t hesitate to embrace the grain that higher ISO values introduce; it often enhances the gritty, authentic atmosphere of urban night photography.
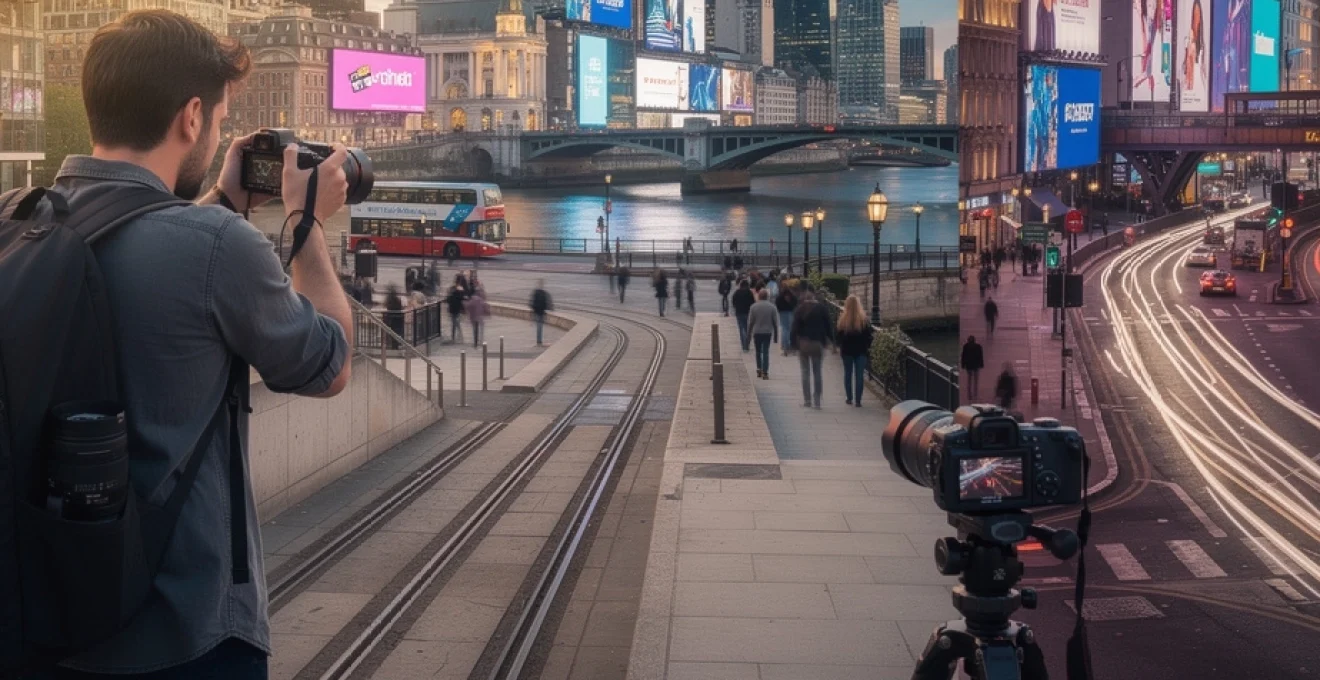
Shutter speed techniques for capturing motion at piccadilly circus
Shutter speed serves as your primary tool for controlling motion in urban scenes. In bustling locations like Piccadilly Circus or Times Square, where crowds surge past illuminated advertising displays, your shutter speed choice fundamentally shapes the narrative your image conveys. Fast shutter speeds—1/500th of a second or quicker—freeze pedestrians mid-stride, capturing the energy and diversity of individual faces within the crowd. This approach works brilliantly when you want to document specific interactions or showcase the variety of people inhabiting urban spaces.
Alternatively, slower shutter speeds transform crowds into rivers of motion, creating ghostly blurs that emphasise the relentless pace of city life whilst keeping static architectural elements sharp. Speeds between 1/4 and 2 seconds work particularly well for this effect, though you’ll need a sturdy tripod or stable surface to prevent camera shake from ruining the stationary elements. Some photographers experiment with intentional camera movement (ICM) during longer exposures, panning with moving subjects or deliberately shifting the camera to create abstract impressions of urban energy. This technique, whilst polarising, can
produce powerful impressions of advertising billboards, traffic and crowds without needing to show every detail. As you experiment, keep an eye on your histogram and review images at 100% zoom to ensure that your creative blur doesn’t drift into accidental softness caused by camera shake. When in doubt, bracket your shutter speeds—shoot a sequence at 1/8s, 1/2s and 1s—so you have options later when editing.
Aperture control for bokeh effects against skyscraper backdrops
Aperture is your primary creative tool for controlling depth of field in urban environments, particularly when you want to isolate a subject against a busy city backdrop. Wide apertures such as f/1.4–f/2.8 allow you to create creamy bokeh from office lights, car headlights and illuminated windows, turning harsh urban elements into soft, atmospheric orbs of colour. This works especially well when photographing portraits in financial districts or street details against skyscraper skylines.
To maximise background blur, combine a wide aperture with a longer focal length and get physically closer to your subject. For example, a 50mm or 85mm lens at f/1.8, positioned a metre or two from your subject, will melt even a cluttered background into an abstract wash of light. Be mindful, however, that very shallow depth of field leaves little room for focusing errors; use single-point autofocus on the eye for portraits or switch to manual focus and magnification for static subjects like street art or architectural details.
In some urban travel photography scenarios, you may actually want more depth of field to keep both your subject and skyline recognisable. Stopping down to f/5.6–f/8 balances subject separation with sufficient context, ensuring city landmarks remain identifiable behind your subject. Think of aperture as a storytelling dial: wide for intimate, dreamy moments; narrower for documentary-style images where the relationship between person and place is equally important.
Exposure compensation for high-contrast architectural scenes
Cities are full of high-contrast situations that can easily trick your camera’s metering system—glittering glass skyscrapers against deep shadows, bright clouds above dark stone cathedrals, or white facades catching midday sun. In these cases, exposure compensation becomes an essential tool, even if you prefer to work in aperture or shutter priority rather than full manual mode. By dialling in +1 or -1 stop of exposure compensation, you can quickly override the camera’s tendency to render bright scenes too dark or dark scenes too bright.
When photographing light-toned architecture, such as white marble or pale limestone, your camera will often underexpose to protect highlights, leaving the building looking dull and grey. Try adding +0.3 to +1 EV of exposure compensation to restore the perceived brightness while keeping an eye on the highlight warning (“blinkies”) to avoid clipping important details. Conversely, for dark facades or deep shadows, a negative exposure compensation (around -0.3 to -1 EV) can preserve mood and prevent midtones from becoming washed out.
A useful approach for urban travel photographers is to expose for the highlights and recover shadows later in post-processing, especially if you’re shooting RAW. In practice, this often means leaning slightly towards underexposure in high-contrast situations—for example, -0.3 to -0.7 EV when shooting towards a bright sky. Think of exposure compensation as a quick, intuitive way to bias your camera’s “best guess” towards your creative intent without having to change your core settings for every frame.
Compositional techniques for urban architecture and streetscapes
Once you’re comfortable with exposure in cities, composition becomes the next major lever for elevating your urban travel photography. Urban destinations are dense with visual information—signage, cables, traffic, people—so learning to organise that chaos into clean, intentional frames is crucial. Strong composition helps guide the viewer’s eye, emphasise scale, and reveal patterns that might otherwise go unnoticed in the bustle of city life.
Think of the city as a three-dimensional grid of lines, shapes and layers rather than a chaotic street scene. By deliberately choosing vantage points, aligning architectural features and paying attention to edges and corners, you can transform ordinary intersections and train stations into graphic, memorable images. The following compositional techniques are particularly effective in metropolitan settings and can be applied whether you’re using a smartphone or a professional mirrorless system.
Leading lines using roads, railways and staircases in metropolitan settings
Leading lines are one of the most powerful compositional tools available in urban environments, where straight edges and strong geometry are everywhere. Roads, tram tracks, railway lines, handrails, escalators and even rowed streetlights can function as visual arrows, pulling the viewer’s gaze into and through your image. When used thoughtfully, they not only create depth but also direct attention towards your main subject, whether that’s a landmark building or a lone figure crossing the street.
To make the most of leading lines, adjust your shooting position rather than simply zooming in and out. Crouching low at the start of a zebra crossing or placing your camera near ground level by a curved tram rail can exaggerate perspective, turning subtle lines into dynamic compositional elements. In busy locations like metro stations, wait for a decisive moment—a single commuter walking along the platform or a train entering the frame—so the lines guide the eye towards a clear focal point rather than disappearing into clutter.
Ask yourself before pressing the shutter: where does my viewer’s eye enter the frame, and where does it travel? If the answer is “everywhere at once”, refine your composition until one or two strong lines dominate the scene. Over time, you’ll start to see paths, bridges and staircases not just as infrastructure, but as ready-made compositional frameworks for your urban travel photography.
Rule of thirds application in vertical city compositions
The rule of thirds remains a simple yet highly effective guideline when composing tall buildings and vertical cityscapes. In practice, this means mentally dividing your frame into a 3×3 grid and placing key elements—horizons, tower tops, street level activity—along those gridlines or at their intersections. For urban travel photographers, this is especially helpful when balancing towering skyscrapers against smaller foreground subjects like pedestrians or street vendors.
When shooting vertically (portrait orientation), try positioning the primary building along one of the vertical third lines, leaving room on the opposite side for negative space, sky or secondary elements. For example, you might place a high-rise on the right third while a busy street fills the lower left intersection, creating a sense of scale and context. Similarly, in horizontal compositions, aligning the city skyline with the upper or lower third rather than dead centre often produces a more dynamic, professional-looking image.
Of course, rules are made to be broken, but learning to use the rule of thirds consistently gives you a solid foundation before you experiment with more unconventional framing. Many cameras and smartphones allow you to enable a thirds grid overlay; keeping this on while you shoot in unfamiliar cities can act as a quiet compositional coach in your viewfinder, helping you refine your framing in real time.
Frame within frame using windows, doorways and archways
Framing your subject within another element of the scene adds depth and context, and urban destinations are full of natural frames waiting to be used. Doorways, windows, archways, bridges, bus shelters and even gaps between parked cars can all create a “frame within a frame” effect. This technique draws the viewer’s eye towards your subject while simultaneously hinting at the environment that surrounds it, making your travel photography more immersive and narrative-driven.
To apply this in practice, position yourself so that part of the scene—an arch, railing or shop entrance—forms a border around your main subject. Focus on the subject inside the frame and allow the edges to fall slightly out of focus if you’re using a wider aperture; this adds a subtle sense of separation and three-dimensionality. In historic districts, photographing a modern skyline through an old stone archway can visually communicate the contrast between past and present in a single frame.
Patience is key when using frames in busy public spaces. You might find a perfect window or bridge arch and then need to wait several minutes for the right person to walk past or for a red bus to enter the framed area. Think of the frame as your stage and the city as your cast; your job is to stay ready for the moment when the story comes together.
Symmetry and patterns in modern glass facades and brutalist structures
Many urban destinations, especially financial districts and post-war neighbourhoods, offer rich opportunities for exploring symmetry and repetition. Glass curtain walls, apartment balconies, concrete grids and tiled underpasses all create patterns that can be incredibly striking when photographed head-on. By aligning your camera precisely with the centreline of a building or interior, you can emphasise perfect symmetry and turn everyday structures into almost abstract works of art.
To achieve this, take a moment to carefully level your camera and check verticals and horizontals in your frame. Small tilts become very noticeable when working with architectural symmetry, so use your camera’s electronic level or grid overlay where available. Step back or use a wider lens if necessary to avoid perspective distortion, or correct remaining converging lines later in post-processing using lens corrections and transform tools.
Patterns don’t need to be perfectly regular to be compelling. Sometimes the most interesting urban travel images arise when a repetitive façade is disrupted—a single open window, a brightly coloured balcony among grey concrete, or one person standing in an otherwise empty grid of steps. These subtle breaks in pattern give the viewer’s eye a place to rest and can serve as a visual metaphor for individuality within the uniformity of city life.
Optimal lighting conditions and golden hour scheduling for cityscapes
Light in cities behaves differently than in open landscapes. Reflections from glass, narrow streets that fall into shade by mid-morning, and powerful artificial lighting all combine to create complex, sometimes unpredictable conditions. Understanding when and where to shoot in an urban destination can dramatically improve your results, often more than any camera upgrade. Planning around golden hour, blue hour and even harsh midday light helps you take control of the mood and clarity of your images.
Instead of thinking only in terms of “good” and “bad” light, it’s more useful to match each lighting condition to an appropriate subject. Soft dawn light might be ideal for waterfront skylines, while the high contrast of midday can work for graphic, black-and-white studies of architecture. With a bit of research and a few reliable apps for sun position and weather forecasts, you can structure your shooting days to capture cities at their most photogenic moments.
Blue hour photography along the thames and waterfront promenades
Blue hour—the period of deep twilight just before sunrise and after sunset—is arguably the best time to photograph illuminated cityscapes. Along rivers like the Thames, Seine or Hudson, the balance between the cool ambient sky and the warm artificial lights of bridges, office towers and riverside promenades creates a rich colour contrast that cameras capture beautifully. Water surfaces also reflect these lights, doubling the visual impact and helping to fill empty foregrounds.
For blue hour cityscapes, arrive early and be set up with your composition before the lights reach their peak. The window of optimal light is surprisingly short, often just 20–30 minutes. Use a tripod or stable surface, set a low ISO (100–400) for maximum image quality, and work with apertures around f/8–f/11 to keep the entire scene sharp. Shutter speeds will naturally lengthen into the multi-second range, which has the added benefit of smoothing water and blurring moving traffic and pedestrians into pleasing streaks and ghosts.
If you’re travelling and only have one chance to capture a skyline, bracket exposures—one slightly underexposed, one nominal and one slightly over—so you can choose the best file or blend them later for optimal dynamic range. Remember that blue hour varies with latitude and season, so check local times and plan your dinner or transport around this short but highly productive window.
Harsh midday sun management in narrow alleyways and covered markets
Many travellers assume midday sun is unusable for photography, but in dense urban environments it can actually be a powerful creative ally—provided you manage it carefully. In narrow alleyways, souks and covered markets, overhead light filters through gaps and openings, creating dramatic shafts of illumination that spotlight selected areas while leaving others in deep shade. This high-contrast look is ideal for black-and-white travel photography or for colour images with a strong graphic feel.
To handle the extreme dynamic range, expose for the highlights to avoid blown-out patches where light hits pavement or walls. Let the shadows fall where they may; modern sensors and RAW files allow you to gently lift shadow detail later without introducing too much noise. Using spot or centre-weighted metering helps prevent the camera from overexposing bright areas to compensate for surrounding darkness.
When working in markets and bazaars, look for pools of light where subjects naturally pause—stalls, doorways, seating areas—and wait for interesting moments. The bright spots act like a stage, drawing attention to fruit sellers, tailors or café patrons while the surrounding penumbra recedes into obscurity. If the extremes feel too harsh in colour, consider converting your images to monochrome in post; harsh sunlight that looks unflattering in colour often becomes beautifully dramatic in black and white.
Artificial light mixing with neon signs in times square style districts
Entertainment districts filled with neon signs, LED billboards and shopfronts present both an exciting opportunity and a technical challenge. The mix of colour temperatures—cool LEDs, warm tungsten lights, greenish fluorescents—can result in colour casts that are difficult to correct if you rely solely on auto white balance. However, these same mixed lights are what give places like Times Square, Shibuya or Mong Kok their distinctive atmosphere, so the goal is to embrace the chaos while retaining some control.
One strategy is to choose a white balance preset (such as “Tungsten” or a custom Kelvin value around 3200–4000K) and stick with it for a series of images, accepting that some colours will skew stylistically. This consistency helps your final set of urban night photos feel cohesive, even if it isn’t technically “perfect”. Alternatively, shoot in RAW and leave white balance on auto, then fine-tune each image or batch in post-processing where you have more latitude.
Because neon-lit areas are deceptively bright, it’s easy to underexpose people’s faces while preserving sign detail, or vice versa. Spot meter on your main subject or use exposure compensation to keep skin tones in a pleasing range, and allow some signs to clip if necessary. After all, your goal is to capture the human experience of the place, not produce a perfectly balanced product shot of every billboard.
Long exposure techniques for light trails on busy motorways
Long exposures of car light trails are a staple of urban travel photography, transforming congested motorways and overpasses into ribbons of colour. To create these images, you’ll need a tripod or solid surface, a low ISO and a small aperture (such as f/8–f/16) to allow for exposures in the 5–30 second range. As vehicles move through the frame, their headlights and taillights trace continuous lines that convey motion and energy, while static elements like bridges and skyscrapers remain crisp.
When choosing a viewpoint, look for curves, junctions or elevated walkways where traffic flow creates pleasing shapes rather than straight, monotonous lines. Overpasses, pedestrian bridges and rooftop car parks are often ideal vantage points. Switch your camera to manual focus to avoid hunting in the dark, focusing once on a well-lit area at mid-distance and then leaving it locked for the sequence.
If your camera supports it, using a remote release or 2-second timer reduces the risk of camera shake when starting the exposure. Experiment with different shutter lengths: shorter exposures might capture discrete streaks from individual cars, while longer ones blend multiple vehicles into continuous, bright ribbons. As with all long exposure work, review your histogram and adjust settings iteratively until the balance between ambient exposure and trail brightness matches your vision.
Essential lens selection for urban photography scenarios
Choosing the right lenses for urban travel photography is as much about practicality as it is about creative possibility. Cities demand that you move quickly, often on foot, and carry your gear for hours at a time. A minimal yet versatile lens kit will allow you to respond to a wide range of shooting situations—from cramped interiors and towering skyscrapers to candid street portraits—without weighing you down or drawing excessive attention.
Most travel photographers favour a three-lens approach: a wide-angle for architecture and tight spaces, a standard zoom or prime for general use, and a short telephoto for portraits and compressed cityscapes. Depending on your camera system and personal style, you might choose to cover this range with one high-quality zoom or a pair of compact primes. The key is to understand the strengths of each focal length and deliberately reach for the lens that best matches the story you want to tell.
A wide-angle lens (16–24mm on full-frame, 10–16mm on APS-C) excels at capturing dramatic perspectives in narrow streets and interiors. It allows you to include foreground interest—cobbled stones, street art, reflections—while still fitting in soaring facades or vaulted ceilings. Be cautious of distortion at the edges, especially with people; keep important faces and vertical lines closer to the centre or correct them later in software.
A standard zoom, such as a 24–70mm or 24–105mm equivalent, makes an excellent walk-around lens in urban destinations. At the wide end, it handles most architectural and environmental scenes; at the long end, it’s perfect for compressing layers of buildings or isolating details like signage and balconies. If you prefer primes, a 35mm paired with either a 50mm or 85mm offers similar coverage with the added benefits of wider maximum apertures and lighter weight.
Finally, a short telephoto (70–200mm or a fast 85mm prime) opens up entirely different perspectives in cities. Standing back and zooming in allows you to compress receding streets, stack building facades into graphic patterns, or pick out candid moments across busy squares without intruding. In many cases, this “observer at a distance” approach produces more natural, unposed images than shooting close with a wide lens.
Post-processing workflow for urban travel images in lightroom and capture one
Post-processing is where your raw captures from urban destinations are refined into finished images that reflect how the city felt, not just how it looked. Applications like Adobe Lightroom and Capture One offer powerful, non-destructive tools that let you correct exposure, balance colour, enhance detail and manage large volumes of files efficiently. A consistent, repeatable workflow ensures that you spend more time shooting and less time hunting for images or redoing the same adjustments from scratch.
Begin by importing your images into a well-organised catalog, using clear folder structures and meaningful keywords such as city name, neighbourhood and key landmarks. During the initial cull, be ruthless: flag only the frames that genuinely contribute to your story of the destination. Professional travel photographers often keep fewer than 10–15% of the images they shoot from a city, focusing on those with strong composition, clean focus and emotional impact.
Once you’ve selected your keepers, start with global adjustments. Correct white balance to neutralise unpleasant colour casts while preserving the character of ambient and artificial light. Adjust exposure, highlights and shadows to ensure important details are visible without flattening the natural contrast that gives urban scenes their depth. Tools like the Dehaze or Clarity sliders can add bite to hazy skylines and glass facades, but use them sparingly to avoid an over-processed look.
Local adjustments come next and are particularly important for city photography where light can be uneven. Use graduated filters to darken bright skies above skylines, radial filters to subtly brighten faces or key architectural features, and brushes to tame overly bright signage or reflections. In Capture One, layers and masks offer fine-grained control over these targeted edits, while in Lightroom, the Masking panel serves a similar role.
Finally, consider applying a consistent colour grade or preset across a series of images from the same city to unify the collection. This might mean slightly cooler tones for a financial district at dusk, or warmer, softer hues for an old town at sunrise. Export high-resolution files for printing and appropriately resized versions for web and social media, and always maintain backed-up copies of your original RAW files. With a thoughtful workflow, post-processing becomes an extension of your creative vision rather than a chore.
Legal considerations and street photography ethics in public spaces
Photographing in urban environments means sharing space with residents, workers and other visitors, and it’s essential to balance your creative ambitions with respect for local laws and social norms. Legal regulations around street photography vary widely between countries and even between cities. In many places, it is legal to photograph people in public spaces where there is no reasonable expectation of privacy, but restrictions often apply to government buildings, security-sensitive infrastructure and certain commercial properties such as shopping centres.
Before travelling, research basic photography laws for your destination, including any permit requirements for tripods, drones or commercial shoots. Some cities require permission to photograph in subway systems or inside historic buildings, and private security staff may challenge photographers even in seemingly public plazas. When in doubt, remain calm, polite and cooperative; often, a brief explanation that you’re a visitor documenting your travels is enough to resolve misunderstandings.
Beyond legalities, ethical street photography in cities comes down to empathy and transparency. Ask yourself how you would feel if the roles were reversed and someone photographed you in the same situation. While candid images of everyday life are a vital part of urban travel storytelling, there are times—such as with vulnerable individuals or sensitive situations—where it’s better to lower your camera. When photographing close-up portraits, especially in markets or neighbourhoods off the main tourist routes, a simple smile and gesture towards your camera can serve as a polite request for permission.
If someone indicates discomfort or asks you not to take their picture, respect their wishes immediately, even if you are legally within your rights to continue. This respectful approach not only avoids conflict but often leads to more genuine interactions and better photographic opportunities; people are far more likely to engage with you, pose naturally or even suggest interesting locations if they feel seen and respected. Consider offering to share images via email or messaging apps when appropriate; this small gesture can turn a fleeting encounter into a memorable exchange for both photographer and subject.
Finally, be mindful of how and where you publish your urban travel photos. Captions that stereotype neighbourhoods, expose private information or mock local customs can cause harm even if the images themselves are unobjectionable. Strive to represent the cities you visit with nuance and dignity, remembering that you are a guest documenting someone else’s home. When legal knowledge and ethical sensitivity work together, your urban travel photography can both honour the places you explore and resonate more deeply with those who view your work.